
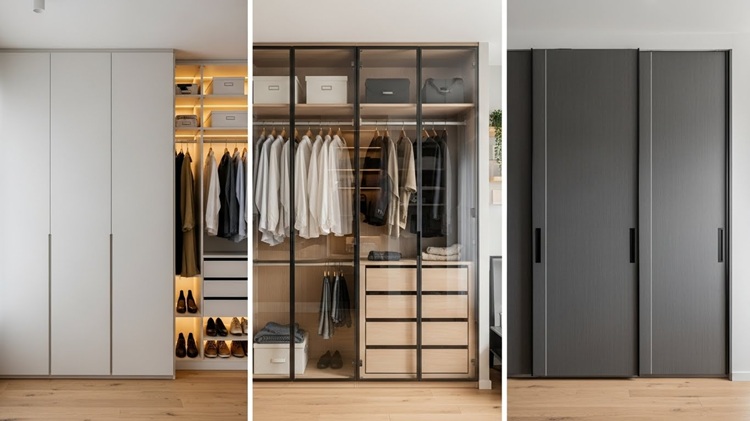

Moving out of a rental isn’t just about stuffing everything into cardboard boxes and calling it a day. There’s that whole cleaning situation to tackle first. Those built-in wardrobes and closets are part of the deal.
You know those spaces where you’ve been shoving everything from winter coats to random storage boxes? They’ve been quietly collecting dust, grime, and probably a few mysterious stains along the way.
It’s time to show them some love before you hand over those keys.
Why These Hidden Spaces Matter
Here’s the thing about rental inspections. Property managers have eagle eyes. They will spot a dusty shelf corner from across the room. Sometimes they even expect the place to look better than when you first walked in with your moving truck.
Built-in storage areas often get overlooked during cleaning frenzies. Skip these spots, and you might find yourself kissing part of your security deposit goodbye. Nobody wants to lose money over something as silly as cobwebs in a closet corner.
Clear Everything out and Prepare for Cleaning
Before you can make any real progress, everything needs to come out of those wardrobes. So, pull out those hangers, grab every last shoe, and don’t forget about these random objects you shoved on the top shelf months ago.
This is actually the perfect opportunity for some spontaneous decluttering. Why pack things you don’t even want anymore? Sort as you go—keep, donate, or toss.
Once everything is out, take a good, hard look at what you’re dealing with. Whether it’s stains on the walls, dust bunnies in the corners, or scuff marks on the floor, make mental notes about trouble spots that will need extra attention.
Dust and Wipe Down Surfaces
Tackling the dust comes next after the wardrobe is empty. Those with high shelves and built-in closets in particular often gather dirt in areas you don’t clean as often.
As you can probably tell, this will take some time, so blast some music or turn on a live radio station to hype yourself up for this task.
First things first, make sure you work systematically from top to bottom. Microfibre cloths work wonders for this job. They grab dust instead of just pushing it around, as some other materials do. Hit every shelf, corner, and surface you can reach.
You also need to pay special attention to those upper shelves where dust loves to settle undisturbed. Don’t rush this step. The more thorough you are, the more it pays off come inspection time.
Deep Clean the Shelves
Now comes the satisfying part—actual cleaning. Mix up some mild all-purpose cleaner or just use a damp cloth for most surfaces. Work methodically through each section.
Shelves need attention first. Then, tackle the walls, looking out for any sticky spots where storage boxes might have left marks. The floor deserves special care as well, especially if you’ve been storing shoes or heavy items there.
Don’t overlook sliding doors. Those tracks collect an impressive amount of grime over time. A small brush or an old toothbrush works perfectly for getting into those narrow spaces. Don’t skip this step because inspectors notice details like this.
Mirrored doors require their own approach. A glass cleaner eliminates streaks and fingerprints that regular cleaners might leave behind. Take your time here. Smudged mirrors are immediately obvious to anyone walking by.
Deal with Stubborn Marks
Wardrobes endure a lot over time. Heavy boxes leave scuffs, and shoes create mysterious marks. These blemishes won’t disappear with regular wiping.
Don’t underestimate the power of soapy water here. It tackles most stains effectively. Use a soft sponge or cloth. Make sure you don’t scrub aggressively, as this could damage delicate surfaces.
It’s also important to test any cleaning method on an inconspicuous area first, especially with wooden or painted surfaces. This is to make sure that the cleaner doesn’t react badly to this specific surface.
Moreover, Magic Erasers work amazingly well on scuff marks. They’re particularly effective on closet floors and door surfaces. Just remember that they’re slightly abrasive, so use gentle pressure.
Clean Up Closet Floors
Closet floors often get neglected during regular cleaning routines. They shouldn’t. This area sees constant traffic and storage, which means more dirt.
Start with a thorough sweep to remove loose debris and dust. Make sure all carpeted floors are vacuumed, and check for any stains that might need spot treatment. Don’t forget about those corners where dust loves to hide.
For hard floors—whether wood, laminate, or tile—damp mopping works best. You also need to work carefully around any built-in features or trim. Look for scratches that could benefit from floor polish or specialised scratch removers.
Sometimes these small touch-ups make a huge difference in the overall appearance. It’s worth the extra few minutes of effort.
Polish the Wardrobe Handles and Hardware
Those handles, knobs, and metal fixtures are magnets for fingerprints. They’re also among the first things people notice when opening closet doors.
A damp cloth works well for most handles. For metal fixtures showing tarnish or heavy buildup, an appropriate metal polish restores that original shine. As for plastic and wooden hardware, they usually just need a quick wipe-down.
This seemingly minor step creates a big visual impact. Clean, shiny hardware suggests overall attention to detail, which is exactly what you want inspectors to notice.
Freshen up the Space
Closed spaces develop musty scents over time. It’s inevitable. Even the cleanest closets can smell stale after being shut up for months.
Here’s a simple solution. Leave doors open for air circulation while you’re handling other moving tasks. Fresh air works wonders for eliminating trapped odours.
For persistent smells, baking soda performs miracles. Leave a small bowl inside overnight, and most smells will disappear. Essential oils on a cloth provide a pleasant fragrance as well.
Call Professional Cleaners
Feeling overwhelmed with everything else on your moving checklist? Professional after tenancy cleaning services often include built-in storage areas in their packages.
These teams know exactly what property managers expect. They bring specialised tools and products that might not be worth purchasing for a one-time job. Plus, they work efficiently while you focus on other moving priorities.
Consider this route if your schedule is packed, or if you want a guarantee of inspection-ready results. This way, you can focus on other aspects of your move, or even unwind by doing something you love.
Conclusion
Your built-in wardrobes are now sparkling clean and ready for their close-up with the property manager. Who knew those forgotten storage spaces could look so good?
Take a moment to admire your handiwork. Open those closet doors with pride instead of shame. Snap a photo if you want. You’ve earned some bragging rights here.
Your future self will thank you when that security deposit lands back in your account instead of disappearing into the “cleaning fee” black hole. Plus, you will sleep better knowing you left the place better than you found it.